 10357Object name:stola[liturgie]Inventory number: T 003Institution, Sint-Truiden Institution:Kerk O.L.Vrouw Hemelvaart[Sint-Truiden] Creator:onbekend (wever) Provenance: Abdij Sint-Trudo[Sint-Truiden]Place of production: Europe date of production :1301 - 1400
 The recreation of a 14th century extant textile to use in the creation of a garment has been a personal goal for quite some time. When searching through the volumes of textile designs for the century, we tend to only see those which were extremely decadent and fancy. These fabrics were created on very sophisticated looms and worn only by the very wealthy, generally imported from the East.
The inability to afford a loom capable of creating such fabrics turned my passion of textile creation to the textiles of the “lower nobility,” for lack of a better feudal term, those fabrics in which priests, knights or lesser lords may have had access to. Tabby woven and basic twill items were becoming less challenging, so the search to find and recreate a twill in a more complex pattern, one that represented the nobility of 14th century society, became the focus.
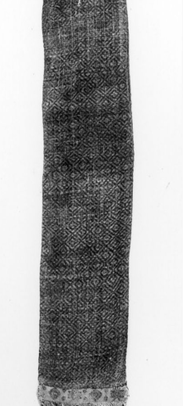
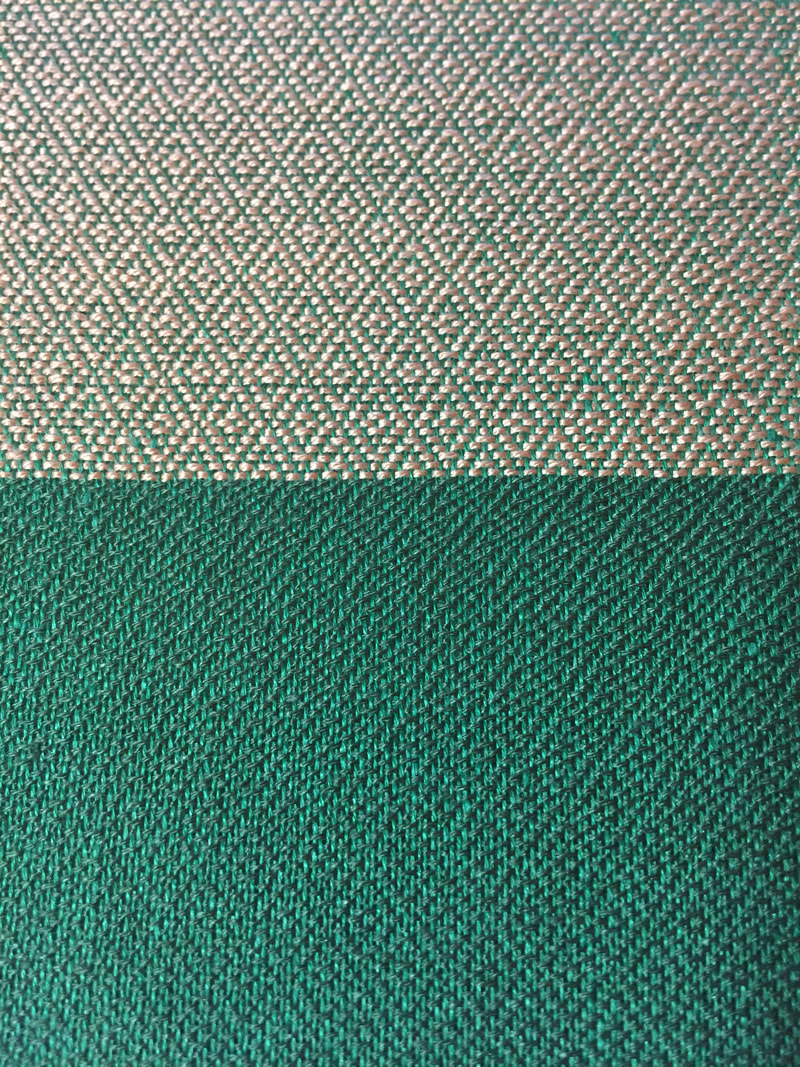
The textile I found to recreate was that of a Stola, described as “Diamond Weave, at both ends, card tissue (the decorative end) green with green fringes.” Also on this stola (not pictured) is a cross that had been hand stitched onto the fabric. The pattern was fitting because it evoked lozenges, which have a special meaning to the intended recipient and there was something about the extent piece that looked solid and lacked the frizzy and distinctively soft look of wool, indicating it was made of a finer fiber. The fringes and card woven trims for this recreation were omitted, as the focus for this project is on the creation of the diamond shaped pattern as a fabric.
Patterning/Drafting
The extant stola is only 5.5cm in width, which is very small. However, that was a clue to the process of patterning this piece. It should be mentioned, this is the first piece the author has attempted from ground up, including the patterning process. Taking on this project as an initiation was particularly beneficial to building understanding of the loom and how it truly functions. For the process, the Complex Weavers Medieval Textile Study Group sample publication was a very useful guide in drafting a pattern from an original textile sample. Looking for pattern repeats, and enlarging the pattern on graph paper were helpful tips for sure. (McKenna, 2003)
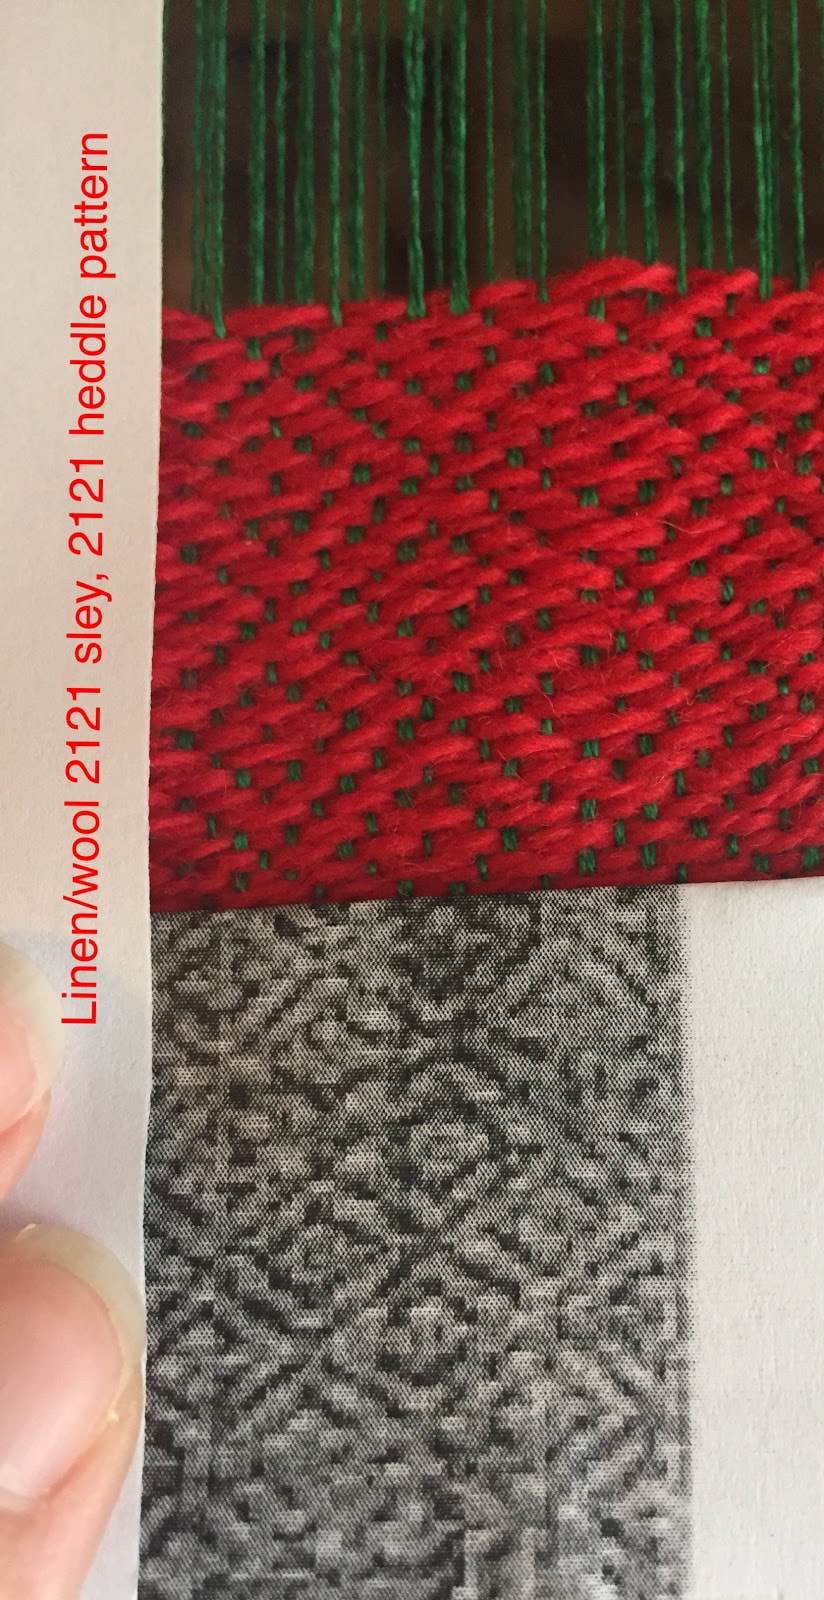
For this textile, a four shaft floor loom was used, though only three shafts were needed for this particular pattern. After creating the pattern, which was a learning process in itself, a sample was woven, sleying one fiber through each slot in the reed. What was produced was a textile with a very large and loose diamond shape. The diamonds were extremely elongated and did not resemble the extant textile. This sett only allowed approximately four diamond shapes across the width of the sample, which was intentionally the width of the extant piece; approximately 5.5 were expected. Pondering what to do next, how to minimize the shapes without resorting to a pattern change, took consulting many publications and other weavers. One suggestion was increasing the amount of threads in each reed, essentially from 15 ends per inch to 30. This seems to be right in line to the sett count that a medieval fabric would have according to Dame Helen, of Dame Helens Library, 14th Century Sewing. When the ends per inch were increased, the sought after 6.5 diamonds appeared across the width of the fabric. This “dressing of the loom” produced the desired look and also increased the workload required before proper weaving could take place. Creating the 540 warps took approximately 8+ hours of winding on a warping board.
The act of dressing the loom from beginning to end took approximately 15 hours total and the actual weaving approximately 18 hours with final fabrics in 18 inch wide pieces about 3 yards in length each.
The inability to afford a loom capable of creating such fabrics turned my passion of textile creation to the textiles of the “lower nobility,” for lack of a better feudal term, those fabrics in which priests, knights or lesser lords may have had access to. Tabby woven and basic twill items were becoming less challenging, so the search to find and recreate a twill in a more complex pattern, one that represented the nobility of 14th century society, became the focus.
The textile I found to recreate was that of a Stola, described as “Diamond Weave, at both ends, card tissue (the decorative end) green with green fringes.” Also on this stola (not pictured) is a cross that had been hand stitched onto the fabric. The pattern was fitting because it evoked lozenges, which have a special meaning to the intended recipient and there was something about the extent piece that looked solid and lacked the frizzy and distinctively soft look of wool, indicating it was made of a finer fiber. The fringes and card woven trims for this recreation were omitted, as the focus for this project is on the creation of the diamond shaped pattern as a fabric.
Patterning/Drafting
The extant stola is only 5.5cm in width, which is very small. However, that was a clue to the process of patterning this piece. It should be mentioned, this is the first piece the author has attempted from ground up, including the patterning process. Taking on this project as an initiation was particularly beneficial to building understanding of the loom and how it truly functions. For the process, the Complex Weavers Medieval Textile Study Group sample publication was a very useful guide in drafting a pattern from an original textile sample. Looking for pattern repeats, and enlarging the pattern on graph paper were helpful tips for sure. (McKenna, 2003)
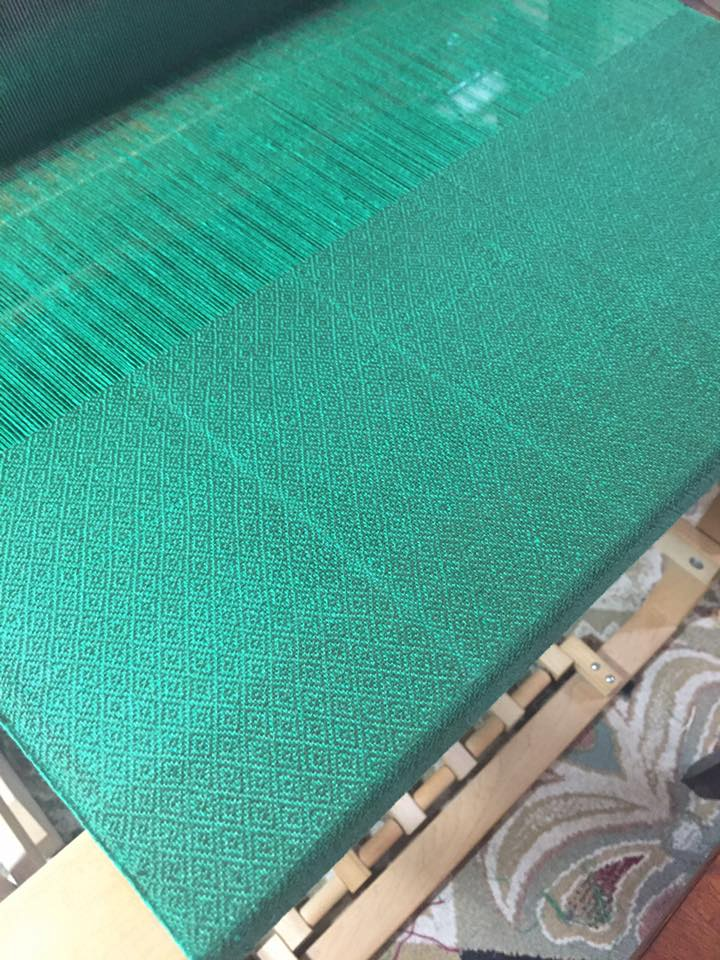
For this textile, a four shaft floor loom was used, though only three shafts were needed for this particular pattern. After creating the pattern, which was a learning process in itself, a sample was woven, sleying one fiber through each slot in the reed. What was produced was a textile with a very large and loose diamond shape. The diamonds were extremely elongated and did not resemble the extant textile. This sett only allowed approximately four diamond shapes across the width of the sample, which was intentionally the width of the extant piece; approximately 5.5 were expected. Pondering what to do next, how to minimize the shapes without resorting to a pattern change, took consulting many publications and other weavers. One suggestion was increasing the amount of threads in each reed, essentially from 15 ends per inch to 30. This seems to be right in line to the sett count that a medieval fabric would have according to Dame Helen, of Dame Helens Library, 14th Century Sewing. When the ends per inch were increased, the sought after 6.5 diamonds appeared across the width of the fabric. This “dressing of the loom” produced the desired look and also increased the workload required before proper weaving could take place. Creating the 540 warps took approximately 8+ hours of winding on a warping board.
The act of dressing the loom from beginning to end took approximately 15 hours total and the actual weaving approximately 18 hours with final fabrics in 18 inch wide pieces about 3 yards in length each.
Pattern drafting and sample creation before weaving
Image 1. Weaving the sample, part 1: much too large diamond forming. DPI (15) pattern 1111
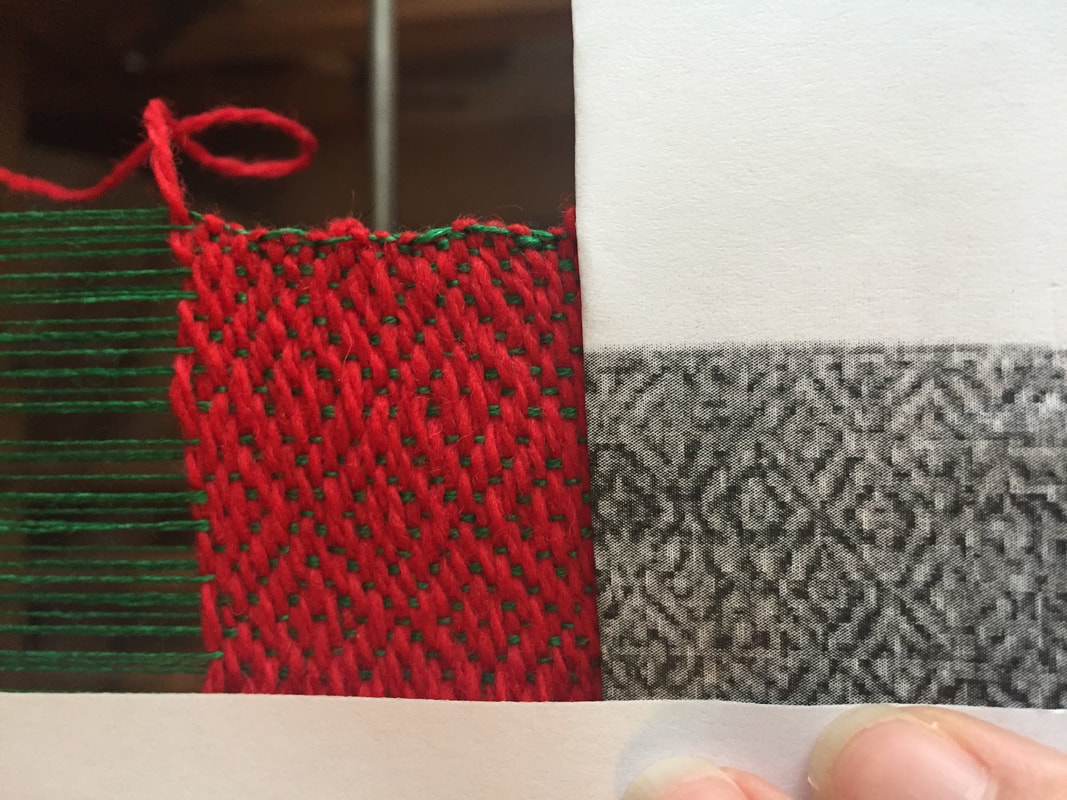
Image 2. Linen/wool 19 DPI wool proving too coarse and large for possible reproduction, but great to see pattern emerging.
Image 3. Increase DPI to 30 and the lozenges come in line with the pattern!
Image 4. Selecting appropriate fibers.
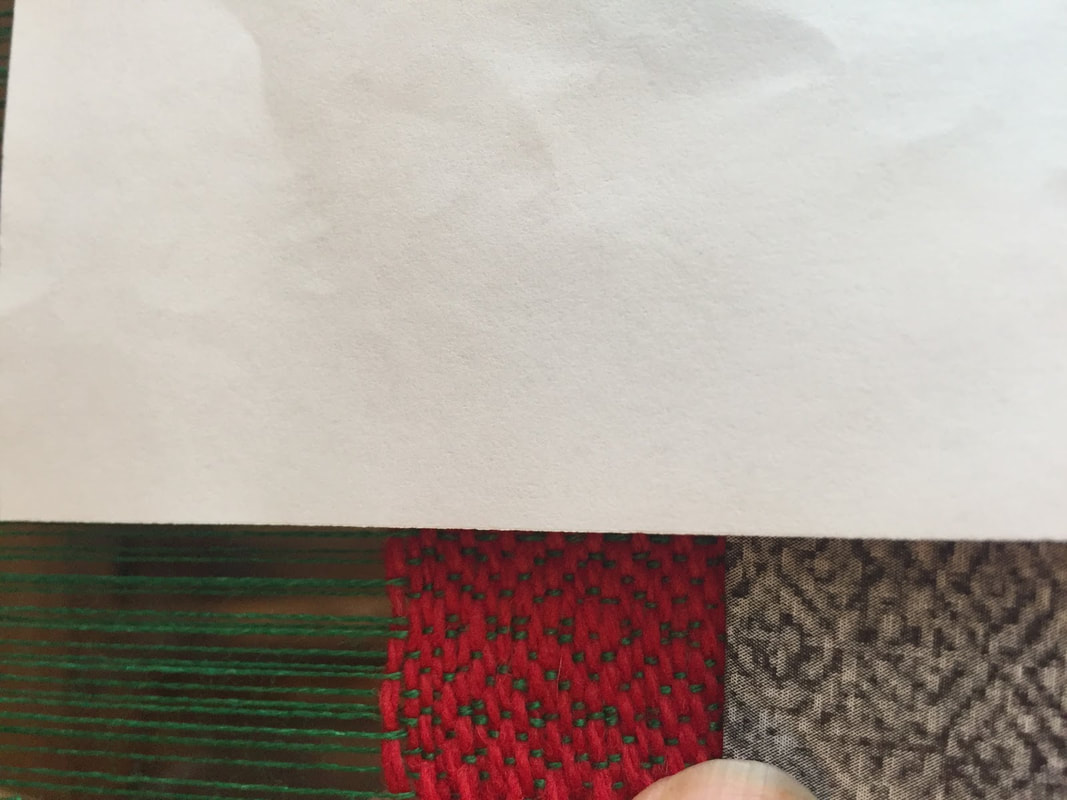
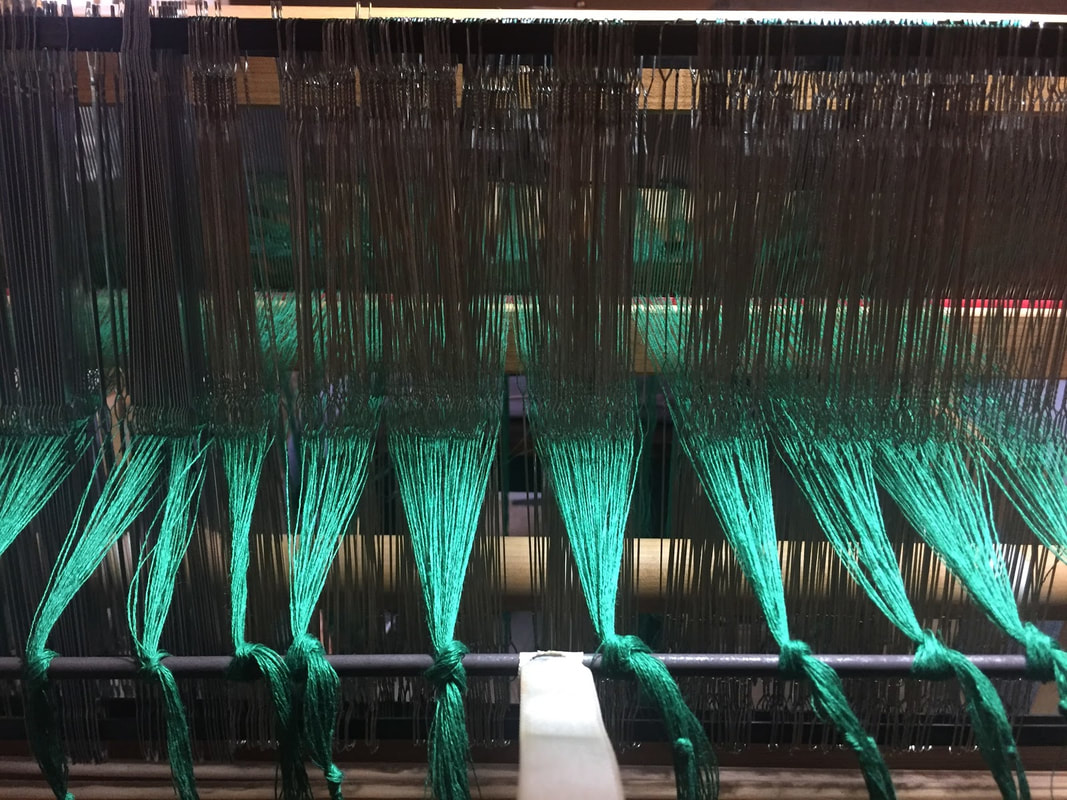
Image 5. Fixing tension issues and increasing sett.
Image 2. Linen/wool 19 DPI wool proving too coarse and large for possible reproduction, but great to see pattern emerging.
Image 3. Increase DPI to 30 and the lozenges come in line with the pattern!
Image 4. Selecting appropriate fibers.
Image 5. Fixing tension issues and increasing sett.
Materials and Methods
The museum housing the extant piece was contacted twice, but unfortunately never responded. The hope was to inquire about a color photo and information on the thread counts. Despite not gathering more information from the museum the decision was made to try and create a material as close to the extant fabric as possible, armed with only the knowledge of the museum description.
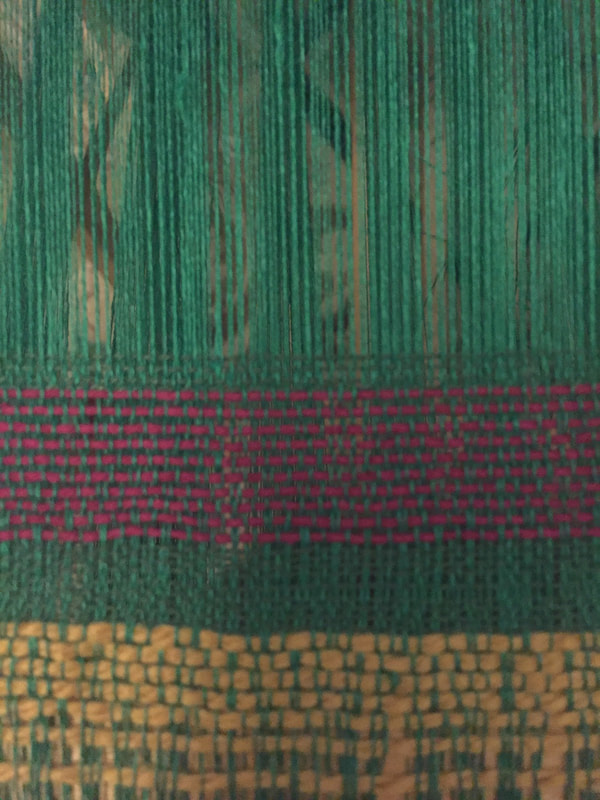
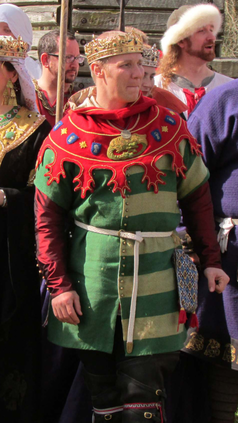
The museum description reveals that the piece is made from silk and linen. Linen became the warp and silk for the weft of my recreation. In retrospect, working with a linen warp was very difficult and brittle. For the next attempt, a silk warp will be used. To help with breaking selvages, misting the linen became paramount; as it turns out, linen loves humidity. The only color mentioned in the museum description was green, other than a white linen cross that had been sewn on it. Two tones of green were chosen, one, the silk, that was a darker moss color, the other, a bright almost Kelly green linen. The greens chosen were to emulate the lovely green stripes I have found in two 14th century ensembles. The extant fabric shows more contrast than mine, whether due to color choice, age or that the photo is in black-and-white. A lighter green color in budget or fiber weight could not be found.
Ultimately, the material was processed and finished to become a garment for a high ranking individual, so it was important to ensure a soft and fine hand to the textile. Much of my research has indicated that the upper class would have had access to silk materials that were not full of slubs and were finely woven. (Crowfoot, 2016) Though housed in Belgium, at the time known as Flanders, the actual placement of the textile is broadly European which allows for the assumption that it would have been plausible for an upper class European to have access to this style and type of material.
The museum housing the extant piece was contacted twice, but unfortunately never responded. The hope was to inquire about a color photo and information on the thread counts. Despite not gathering more information from the museum the decision was made to try and create a material as close to the extant fabric as possible, armed with only the knowledge of the museum description.
The museum description reveals that the piece is made from silk and linen. Linen became the warp and silk for the weft of my recreation. In retrospect, working with a linen warp was very difficult and brittle. For the next attempt, a silk warp will be used. To help with breaking selvages, misting the linen became paramount; as it turns out, linen loves humidity. The only color mentioned in the museum description was green, other than a white linen cross that had been sewn on it. Two tones of green were chosen, one, the silk, that was a darker moss color, the other, a bright almost Kelly green linen. The greens chosen were to emulate the lovely green stripes I have found in two 14th century ensembles. The extant fabric shows more contrast than mine, whether due to color choice, age or that the photo is in black-and-white. A lighter green color in budget or fiber weight could not be found.
Ultimately, the material was processed and finished to become a garment for a high ranking individual, so it was important to ensure a soft and fine hand to the textile. Much of my research has indicated that the upper class would have had access to silk materials that were not full of slubs and were finely woven. (Crowfoot, 2016) Though housed in Belgium, at the time known as Flanders, the actual placement of the textile is broadly European which allows for the assumption that it would have been plausible for an upper class European to have access to this style and type of material.
Inspirational Images (Click to Enlarge):
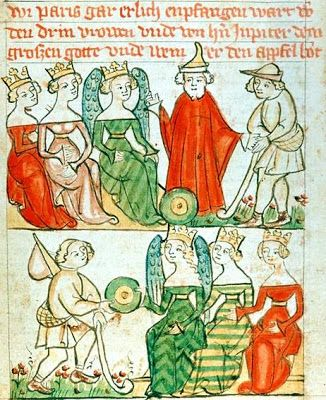
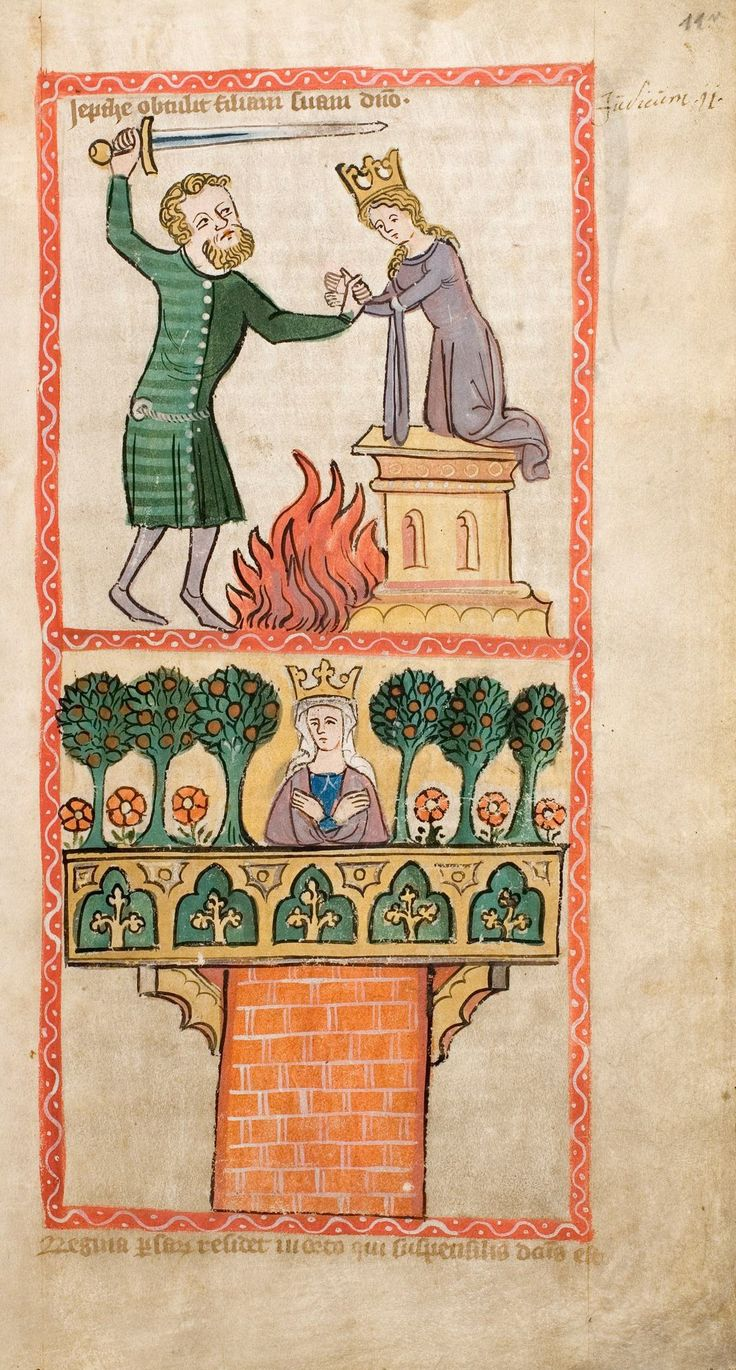
Image 1. Speculum Humanae Salvationis, Westfalen oder Köln, um 1360. ULB Darmstadt, Hs 2505, fol. 11r
Image 2. Historia Troiana, 1395-1400, Wenen, Österreichische Nationalbibliothek, cod. 2915 ; fol. 2r
Image 1. Speculum Humanae Salvationis, Westfalen oder Köln, um 1360. ULB Darmstadt, Hs 2505, fol. 11r
Image 2. Historia Troiana, 1395-1400, Wenen, Österreichische Nationalbibliothek, cod. 2915 ; fol. 2r
Weaving Process
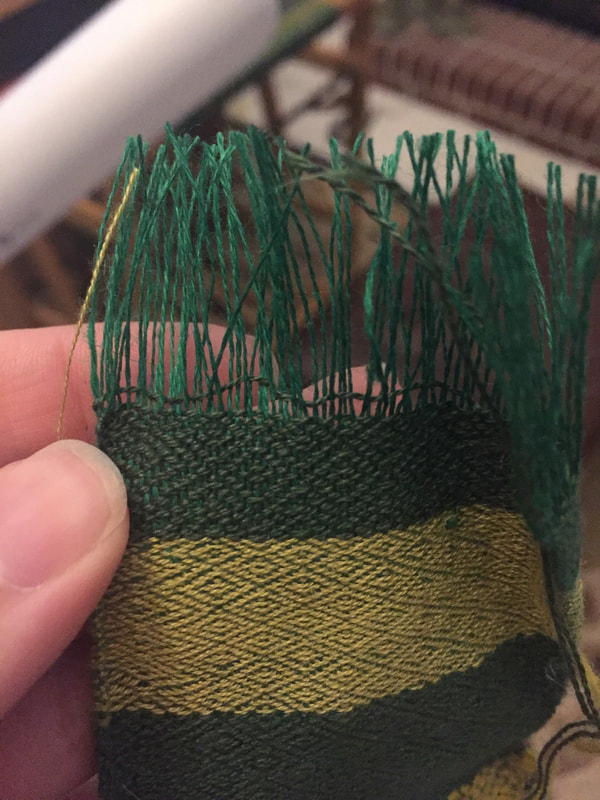
There were tension issues and pattern problems along the way, such as finding two areas where four threads were sleyed through each reed slot instead of two, and having the pattern in correct sequence but too many threads for the area. The more the extant piece was stared at, however, the more it was realized that weaving was not a perfect art. Mishaps occur, sometimes they can be fixed, in other instances not. If one looks at the original image, it appears our period weavers may also have had a few issues with their warps and patterns, as well as the even nature of their beating. The minor issues such as these in the extant piece may have gone unnoticed had I not spent so much time fixing similar issues within this project!.
There were tension issues and pattern problems along the way, such as finding two areas where four threads were sleyed through each reed slot instead of two, and having the pattern in correct sequence but too many threads for the area. The more the extant piece was stared at, however, the more it was realized that weaving was not a perfect art. Mishaps occur, sometimes they can be fixed, in other instances not. If one looks at the original image, it appears our period weavers may also have had a few issues with their warps and patterns, as well as the even nature of their beating. The minor issues such as these in the extant piece may have gone unnoticed had I not spent so much time fixing similar issues within this project!.
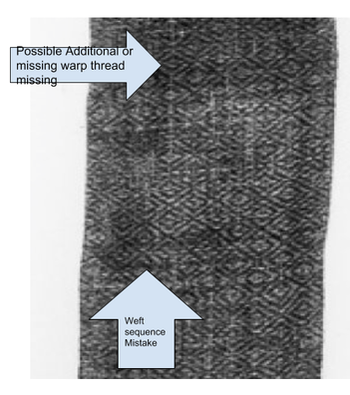
When the weaving process had been completed the next step was finishing. The ends already had a lovely selvedge edge which were created, not using edge cords, but paired and singled ends. (Crowfoot, 2016) The ends of the warp were hand tied in many knots, snugly to the base where the textile now ended. The web was then placed in to a bath of warm/hot water with castile soap where it soaked and agitated off-and-on for a period of 15 minutes. Afterwards the textile was laid on a flat marble surface until it was almost dry to the touch. Calendering is a method used to finish woven fabrics, especially done to linen fabrics to bring out its luster. Calendering in the days of old would have meant heating up a stone or piece of glass and pressing it into your fabric. (Crowfoot, 2016) For this textile it meant heating every inch of my fabric with an iron set to low heat while still slightly damp. The luster that emerged from the calendering was simply beautiful. Just as submerging the web into water had changed the weave, calendering changed the fabric as a whole. Below you will find a gallery of images that show the process of weaving this fabric as well as what its ultimate use became.
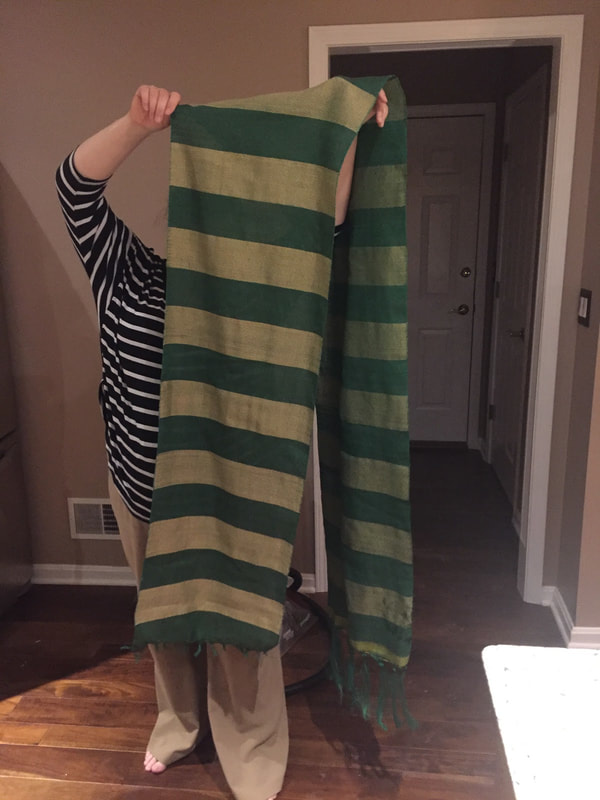
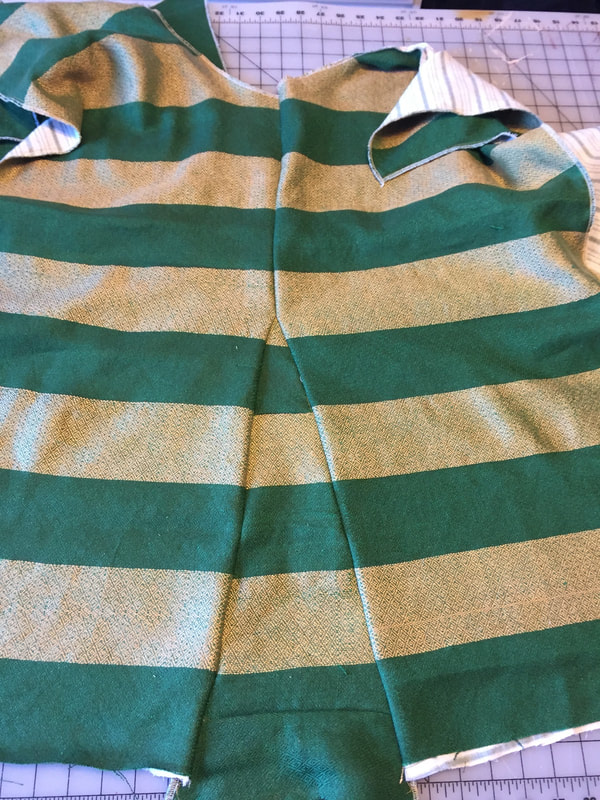

The finished product was lined in linen and had gold bezants affixed to the solid green side. The opposite side I attempted to get fancy and add in a contrasting gold/taupe stripe. Weaving stripes is satisfying yet daunting, if you are off a millimeter it will show when trying to match pieces. To avoid mismatched sections, I measured every stripe and did my best to maintain a consistent beat when weaving. Overall, I am very happy with the project. I have gained a much greater understanding of the process and am already planning my next reproduction fabric.
 RSS Feed
